The Macro Beanbag
by Johan J Ingles-Le Nobel
Last updated August 31, 2017

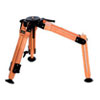
Almost every photographer's bag has a tripod, but there are times when you don't want to traipse about carrying a tripod around and a beanbag maybe the solution to making speedy shots.
Macro beanbags are easy to make yourself and they're not wildly expensive to buy either. Depending on the type of macro photography that you shoot, you might find this a decent alternative to a macro tripod.
Many Uses
A macro photography beanbag is not just limited to using it to shoot from the ground. The models that are sold commercially fit car windows when used on safari, but other uses for your beanbag maybe to use it on fence posts and gates, on top of your camera when it's on the tripod to reduce vibrations or even as a seat to make yourself a little more comfortable on the ground. Or, hang it from the bottom of your tripod to give you extra stabilising weight.
Making A Photography Beanbag
It's quite nice to have a shape that can be folded to give you a little extra heightA beanbag is really not a high precision machine-manufactured precision photography instrument. It is a bag filled with small objects, and as such it doesn't get much easier than this. Get bag, fill, done.
Decide how much surface area you need for your beanbag first, and bear in mind that it's quite nice to have a shape that can be folded to give you a little extra height if you need it for your shot. Bigger is basically better, provided it's nice and solid. Resist the temptation to actually fill your bag with beans straight away but do use a relatively heavy filling material and not something with any bounce or give. If you fill the macro beanbag with beans straight away then any dampness would encourage them to sprout, which would be nothing short of disastrous.
That said, if you put the filling material inside a few bag layers first, ie double bagging the content, and into several small bags rather than all into one big one, then this would be quite helpful if you travel a lot, as you could have it empty on the way to your destination and fill the bags with beans when you arrive. Lots of small bags rather than one big one would allow you to adjust the height easily by adding and removing bags.
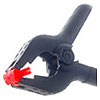
... a versatile photography accessory for low macro because of it's speedChoose a tough waterproof covering that resists thorns and small rocks. Rot proof, ripstop materials are the best, and for that fashionable look add a shoulder strap from an old camera bag to be able to carry it about easily. Nylon can be noisy and slippery and canvas is a better choice. Heavy duty cotton duck fabric is better, as it repels water, but a patch of leather or rubber is also good because it grips the camera body better. A quick release clip is also useful, to be able to attach it to your photography bag. If it's big enough and waterproof enough, you can use a beanbag as a seat in winter or in wet conditions.
Heavy is Better
The heavier the bag, the better it supports your setup! Rice, lentils and beans are easily found and provided you're double bagged, won't get wet. Sand is nice and heavy but is microscopically small and there's the risk you'll puncture the bag and it gets into your camera equipment. There is considerable room for experimentation with the beanbag concept as there is actually nothing to prevent someone adding a removable arca plate-type joint on top to mount your camera on, or you could even consider a plate to take a gimbal or other tripod head.
Versatility
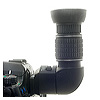
A beanbag is a versatile photography accessory for low macro because of it's speed. You can shape it to your required height or angle much quicker than a tripod. With enough give in the bag, fine focus adjustment is perfectly possible, and you might find it easier to use at ground level if you have a right angled viewfinder, articulated screen or field monitor attached to your camera.
Related Articles